Showing posts with label IC-10. Show all posts

Saturday, December 1, 2012

Ham Shack Update

Well, with the exception of finding a Kenwood SP-120 speaker, I have just about completed a station that any ham from the late 80's to early 90's would be proud to call their own!

Just to brag (or whine, depending on time of day, my mood, and your point of view) my collection contains:

HF:
Kenwood TS-440S/AT (with FM module, IC-10 kit, Voice Module, tuner, and ALL optional filters)
Kenwood PS-430 power supply
Kenwood SP-430 speaker
Kenwood AT-250 outboard tuner (for 160m)
Kenwood IF-232C computer interface
Kenwood MC-50 microphone

VHF:
Kenwood TR-9000 (with ComSpec SS-64 tone module) 2m All Mode radio
Kenwood PS-20 power supply
Kenwood SP-120 speaker
Kenwood BO-9 base shelf
Kenwood TR-7730 (2m FM for APRS)
Mirage B-34-G amplifier with GaAsFET per-amp

UHF:
Kenwood TR-9500 70cm All Mode radio
Kenwood PS-20 power supply
Kenwood BO-9A base shelf
NEED THE SPEAKER!  ;-)

MISC:
SignaLink USB soundcard interface
Homebrew soundcard interface (cost <$20 and works just as well as the Signalink)
Homebrew coax tester
Homebrew LED ambiance lights ;-)
Homebrew PTT mic to PC interface
Wouxon KG-UV3D dual-band HT
Heath bench variable power supply
Radio Shack SWR/power meter
MFJ-941D antenna tuner
Cheap CW key

MOBILE:
Yaesu FT-2900R
Galaxy DX959
Radio Shack HTX-10
Radio Shack PRO-2050 scanner
Homebrew radio console

ANTENNA:
RadioWavz G5RV Lite
Homebrew 2m moxon
Homebrew 2m 1/4 wave ground plane

While this may all seem like an impressive list of equipment, it can all be replaced with one radio these days.  The Kenwood TS-2000, the ICOM 7000, the Yaesu FT-857D will each do everything that this entire list does and take up less space and power in the process!  Plus the new radios have DSP to clean up those weak signals.  On the flip side, all of the equipment listed didn't cost me what a fully loaded TS-2000 would cost.  So, pros and cons to each approach.

Anyhow, here is a quick pic of my shack (ignore the ugly desk, its not finished, and I'm an engineer, not a skilled wood worker, although I generally enjoy trying).


So anywho, there you go.  A shadowy flight into the ham shack of a man who does not exist...  Sorry, couldn't resist the geeky Knight Rider reference.

73 and good night,

Richard, KK4JDO

Friday, August 10, 2012

Installing an IC-10 kit into a Kenwood TS-440S/AT HF Radio

I use Ham Radio Deluxe, or more specifically, Digital Master 780, for most of the digital mode communications that I do (usually just PSK31).  This software is great and does a lot of awesome stuff.  One of those cool things that you can do with HRD is rig control.  This makes it easy to jump from frequency to frequency (QSY in ham-speak) from within the software, instead of having to tune the radio and adjust the software accordingly.  It also keep your PC up-to-date on what frequency your radio is on for automated logging (really help for lazy guys like me).

Anyway, since I have an older radio, I had to modify it with an add-on kit, originally called the Kenwood IC-10 kit.  Kenwood no longer sell this kit since they made the TS-440 over 20 years ago.  However, since this kit is just basically two ICs (an 8251A and a TC4040BP), they can still be obtained.  I got mine off of eBay for $20.  This will allow 4800 baud serial communications via the ACC-1 interface on the back of the radio.

You can then use a round 6-pin DIN connector and a DB9 connector to make a serial interface cable.  Be careful as the TS-440 ACC-1 interface uses TTL voltages (5V) and serial wants to use 12V, you will either need to use Kenwood's IF-232 kit to match the voltages, or use a USB-to-serial converter with normally operates at TTL voltage levels (beware Prolific chipsets).

The install process is fairly simple, it took me around 20 minutes to complete the installation, including the time it took to take the pictures.


This is a picture of the kit itself, basically a serial UART and a CMOS timer chip.  Be sure to take static precautions, it would be a shame to do this install and have it not work due to fried ICs.  Basically, just stay at the same electrical potential as the radio and you'll be fine.  Never touch the chip without touching the radio first.  You could also use a static strap, although I generally find this to be overly cautious unless you are working with extremely sensitive parts (or extremely expensive ones).

Below is a picture of the radio that we are about to perform surgery one, to wit, a Kenwood TS-440S/AT:

Step one is to remove the top cover, which consists of eight screws (four on top, two on each side):

Be sure when you remove the top that you keep track of where the speaker cable goes so that you can put it back together when you are finished.  It is the yellow cable in this picture:

Next, flip it over and repeat the process with the bottom cover (nine screws this time, five on bottom, two on each side):

After that, remove the three screws on the bottom of the heat shield (silver part to the right with the three holes).  Also remove the four screws (two on each side) that hold the front panel in place:

Then remove the two screws that hold the top of the heat shield on:

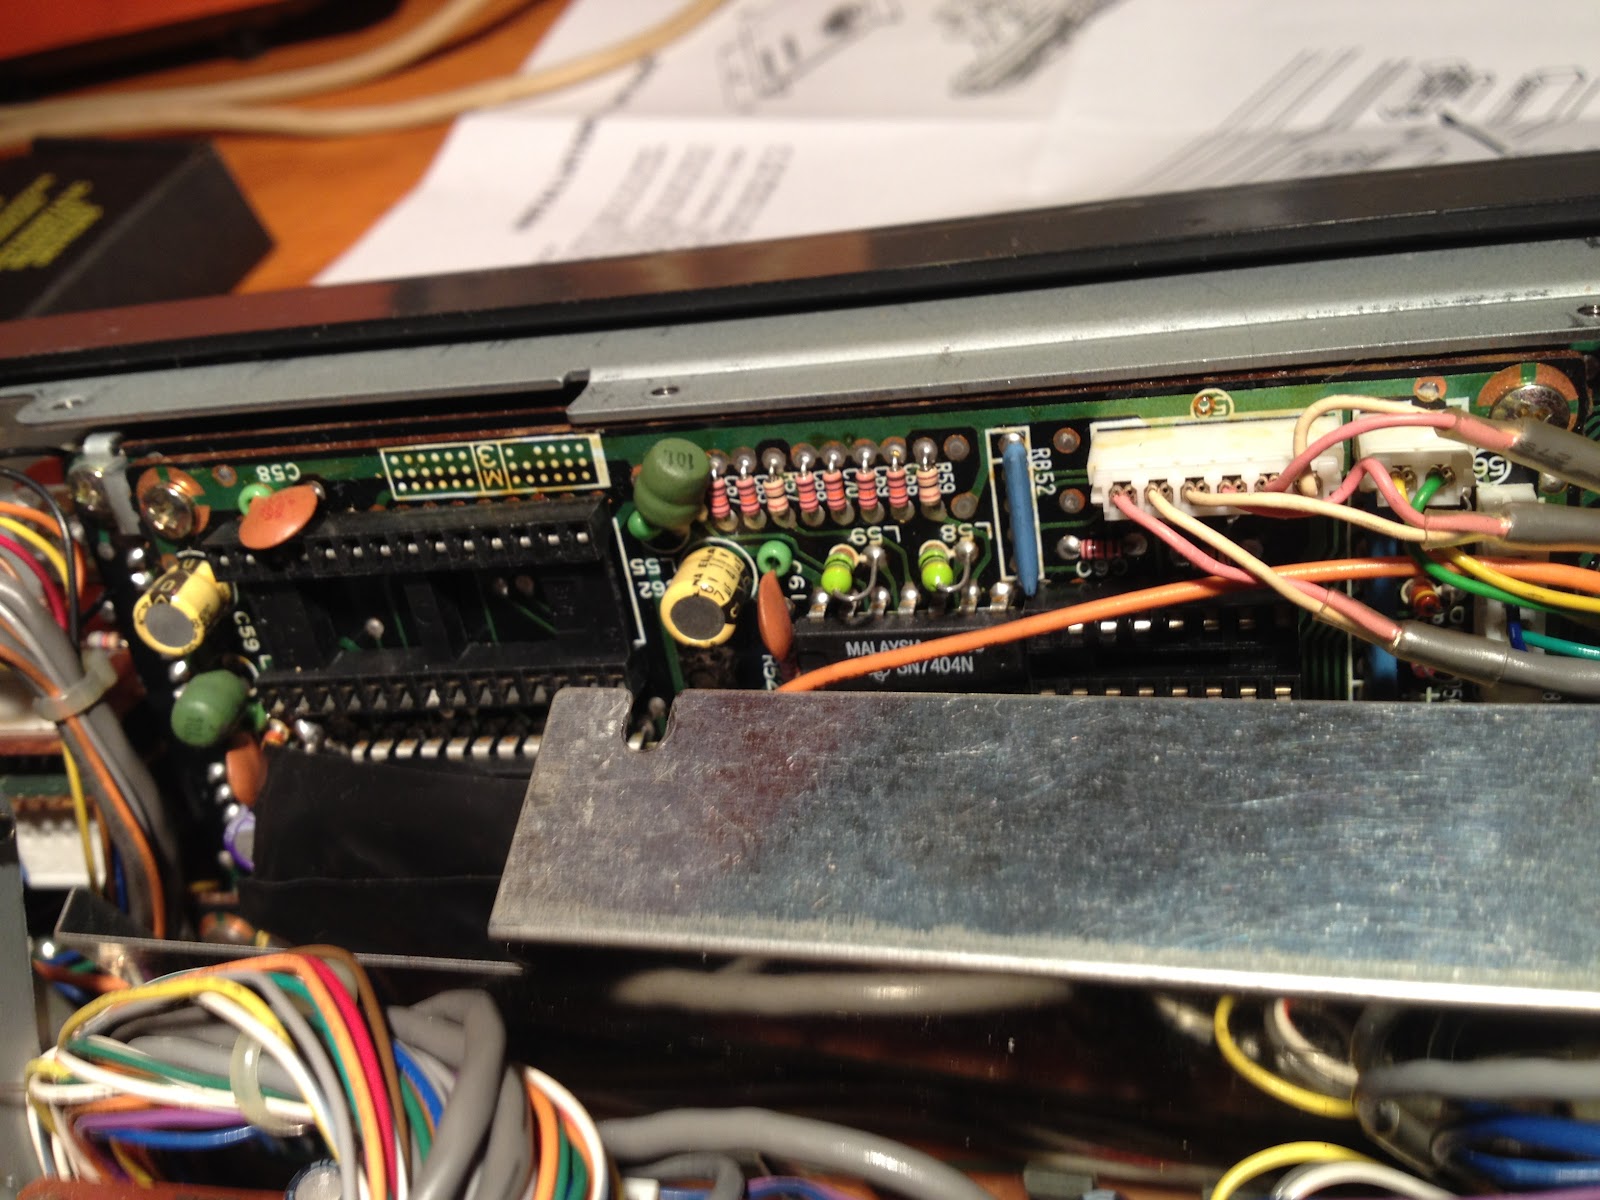
Finally, you will be able to see the two sockets for the two ICs.  The part of the IC with the half-circle indicates the location of pin one.  This view is from the top of the radio, and pin one goes to the left:

I forgot to take a picture before I put the heat shield back on, but this is what it looks like with the IC installed.  I had to compress the pins on the ICs a bit to get them installed, which is common.  Just be careful not to bend them too much, else they may break.

Put the radio back together in the reverse order of above, and you will be off to the races!

 This is the rig control interface for HRD, you can see where I have set the frequency to the 20m PSK calling frequency:

And this is the radio after reassembly and being controlled by the PC.  The downside to this is that you cannot control the volume, nor can you get current S-level readings from the radio back into the software like you can with newer rigs.  But being able to control a 20 year old radio via the PC at all is awesome!!


Put this project together with the soundcard interface that I build in an earlier post, and you have a fully functional rig for digital modes on the ham bands!  This was a really easy and fun project and I gained a lot of useful functionality from my rig!

73,

Richard, KK4JDO